The Heater!!
The heater I've chosen is the Mobile Climate Control model 12-1203, http://www.mcc-hvac.com/. This is available in Canada from Princess Auto, a nationwide chain, part number 9089533, https://www.princessauto.com/en/36000-btu-12v-auxiliary-heater/product/PA0009089533
- 10500 Watts (36000 btu-h)
- 190 l/s (400 cfm)
- 15.6" wide x 6.25" high x 9.62 deep"
- 3 speed
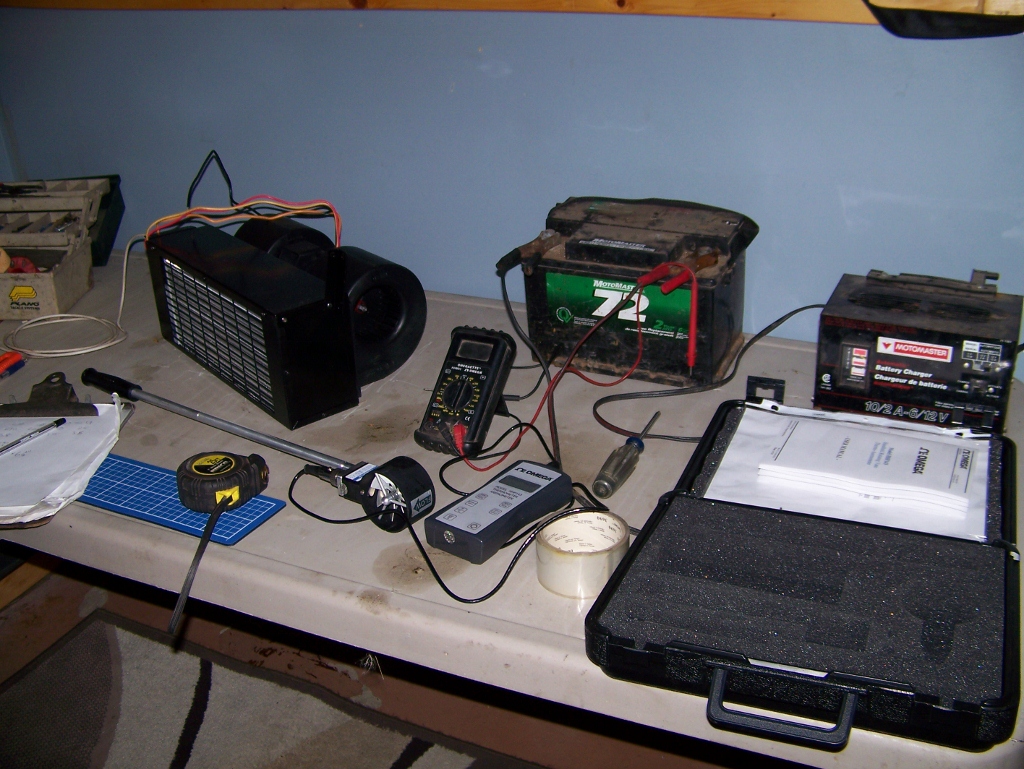
Here is the heater as received getting ready for flow testing.
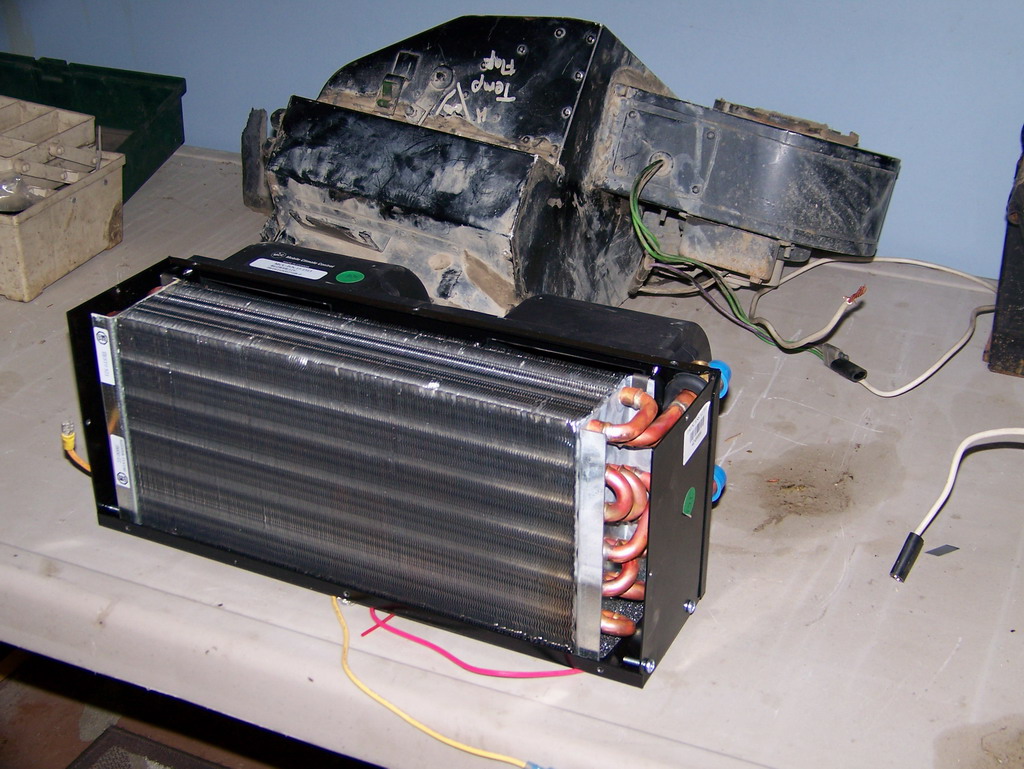
And looking inside we see the monster matrix with 3 rows of 6 tubes each. The fins ares 12.5" x 2.75" x 6.25". The stock heater assembly is in the background.
The Install!!
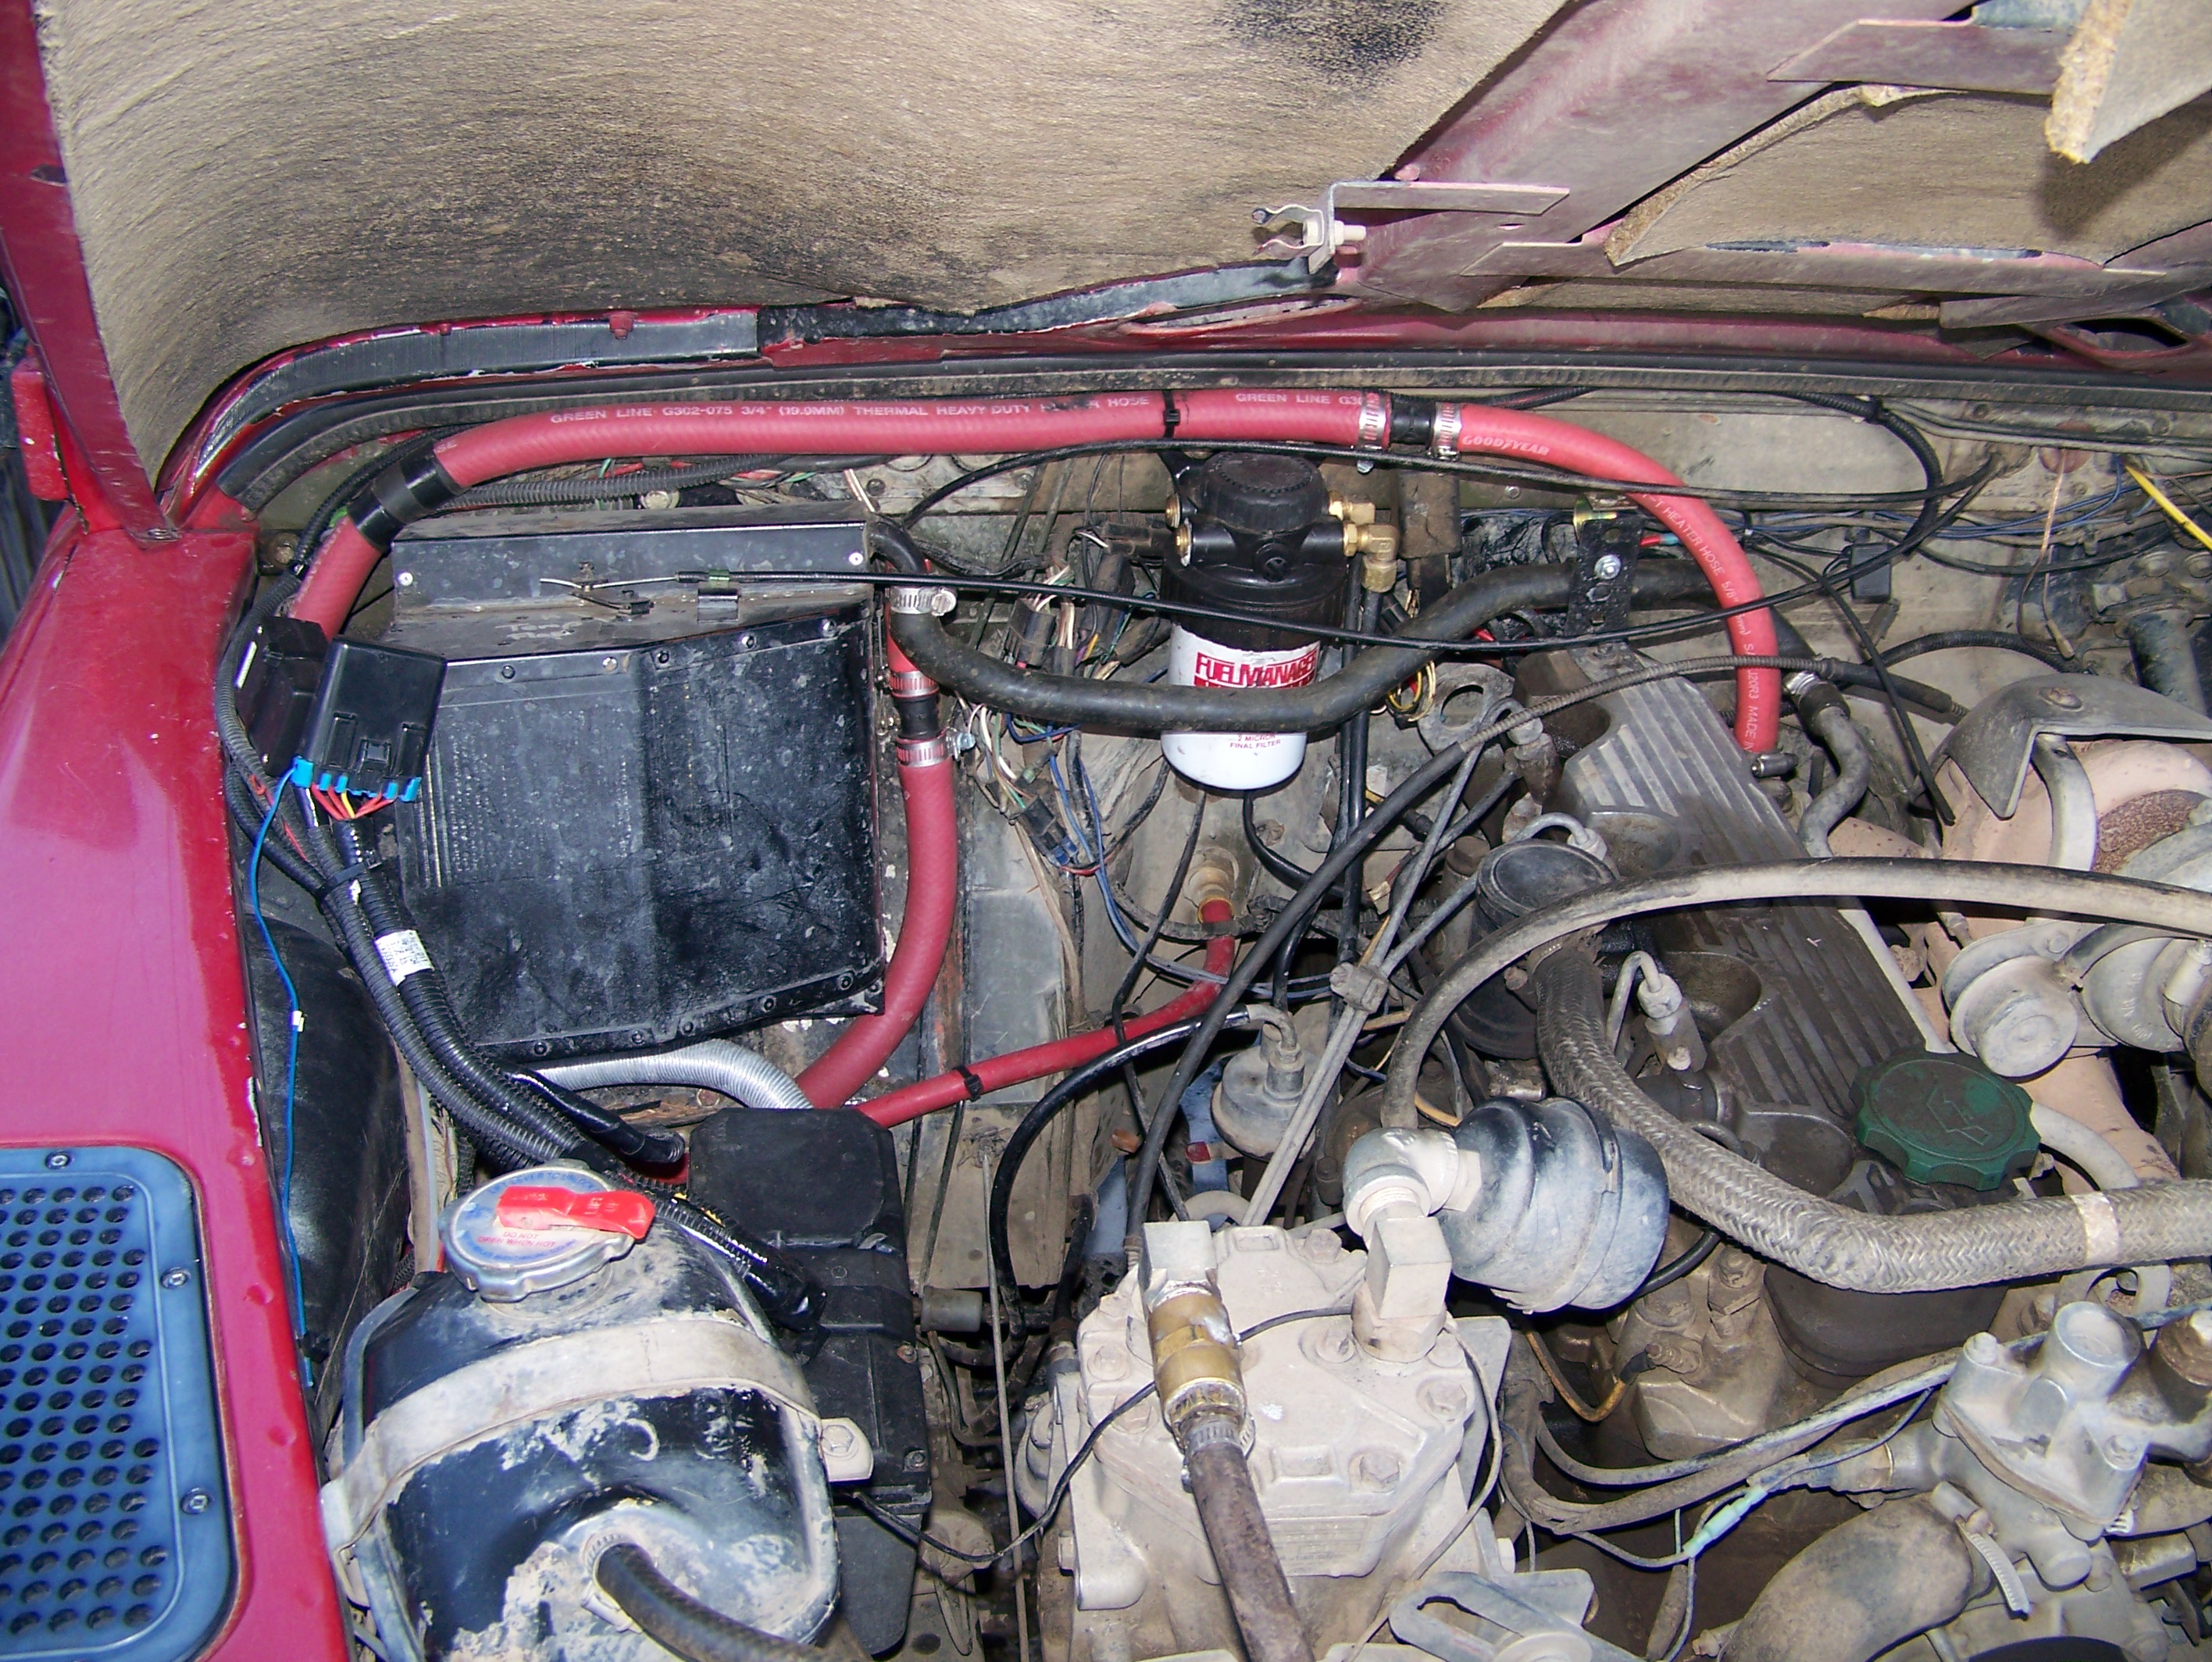
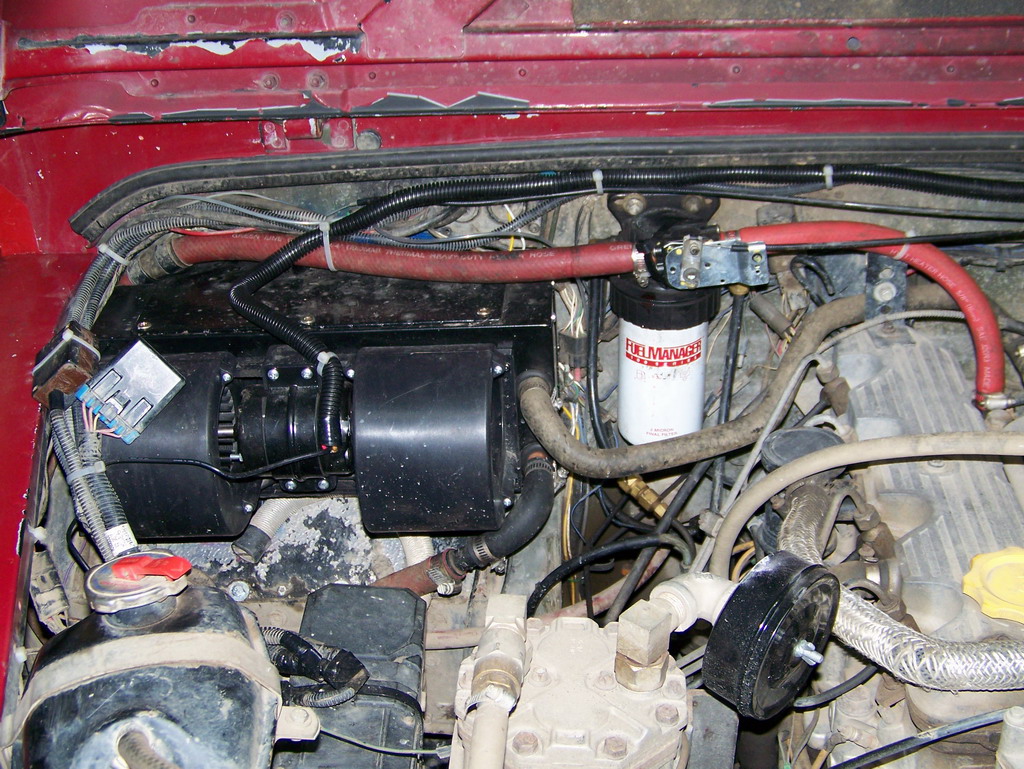
Here we see my engine bay with the stock heater. I have a Webasto heater installed so the heater hose routing is not quite as per normal, but the rest of the install should be the same in any LHD Defender.
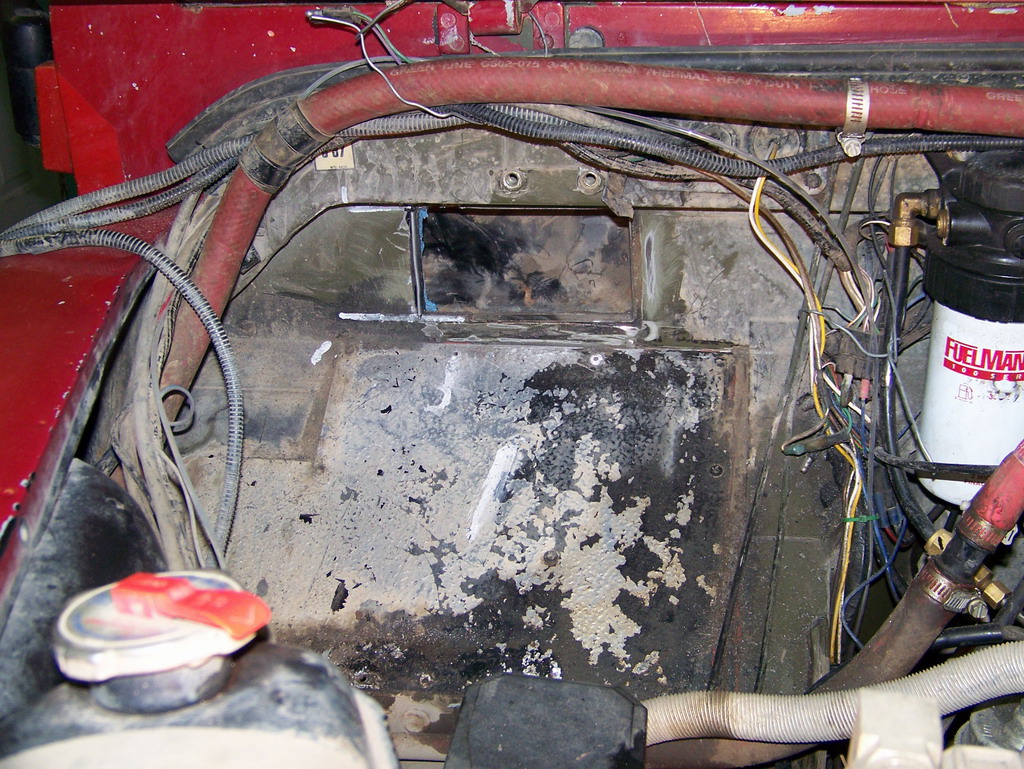
Remove the stock heater and you are faced with this. The hole in the bulkhead is 4.5" wide by 3.25" high. This is a bit small for the flowrate of the new heater. I opened it up to 6" wide which allows re-fitting of the stock heater if desired. I also reshaped the angled portion on the left (with a hammer) to allow clearance for the new heater before this photo.
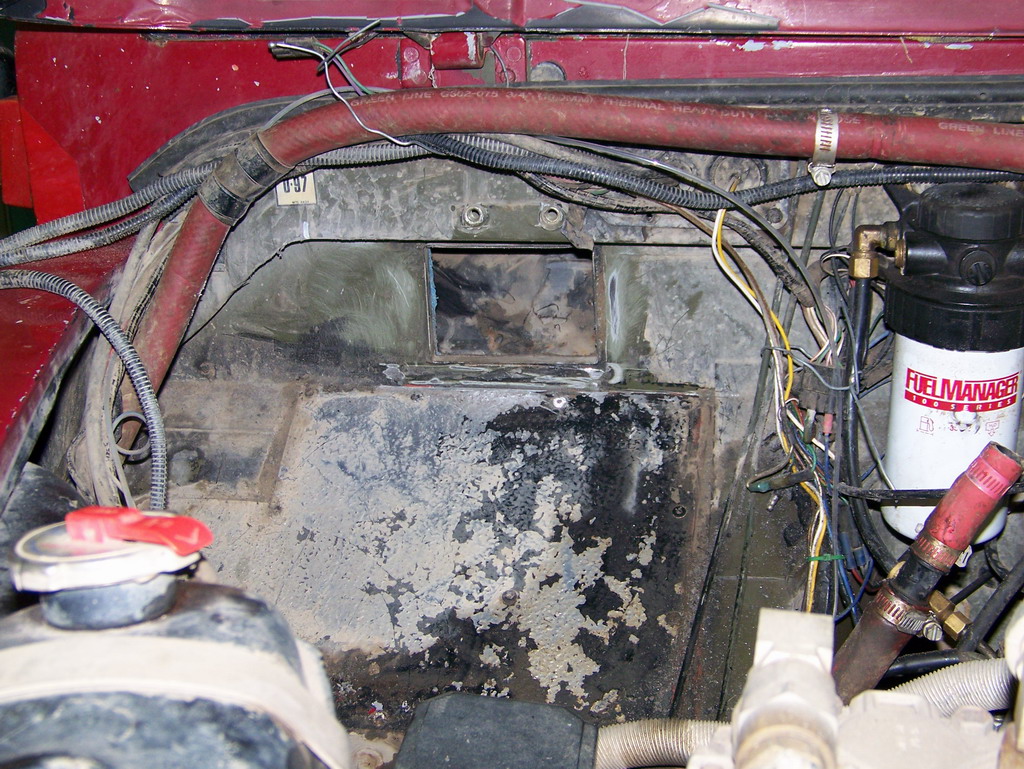
Here is the opening widened to 6"
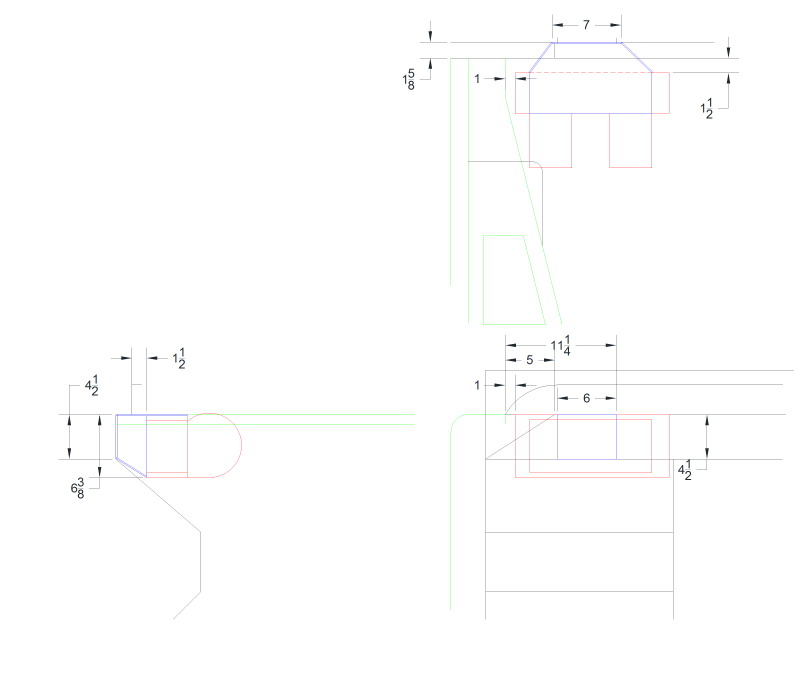
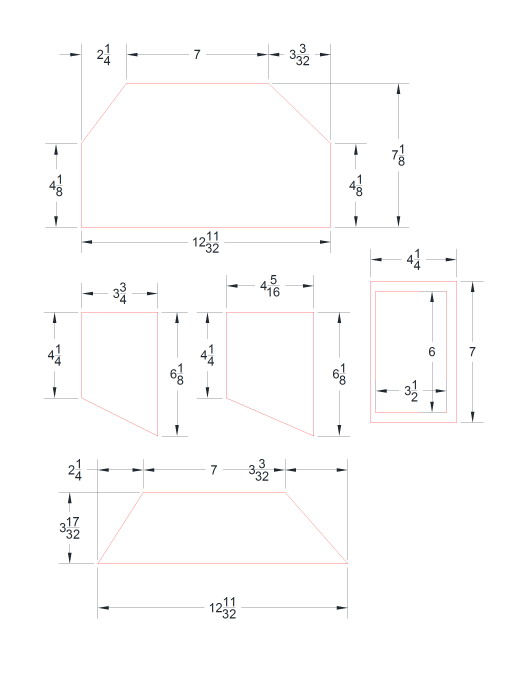
In order to fit the new heater I built a discharge duct and welded it to the outlet housing of the heater. This could easily be made as a bolt on piece as well. Here is a drawing showing the layout of the heater as well as a cutsheet for the duct pieces.
The outlet duct during test fitting for placement of the supports.
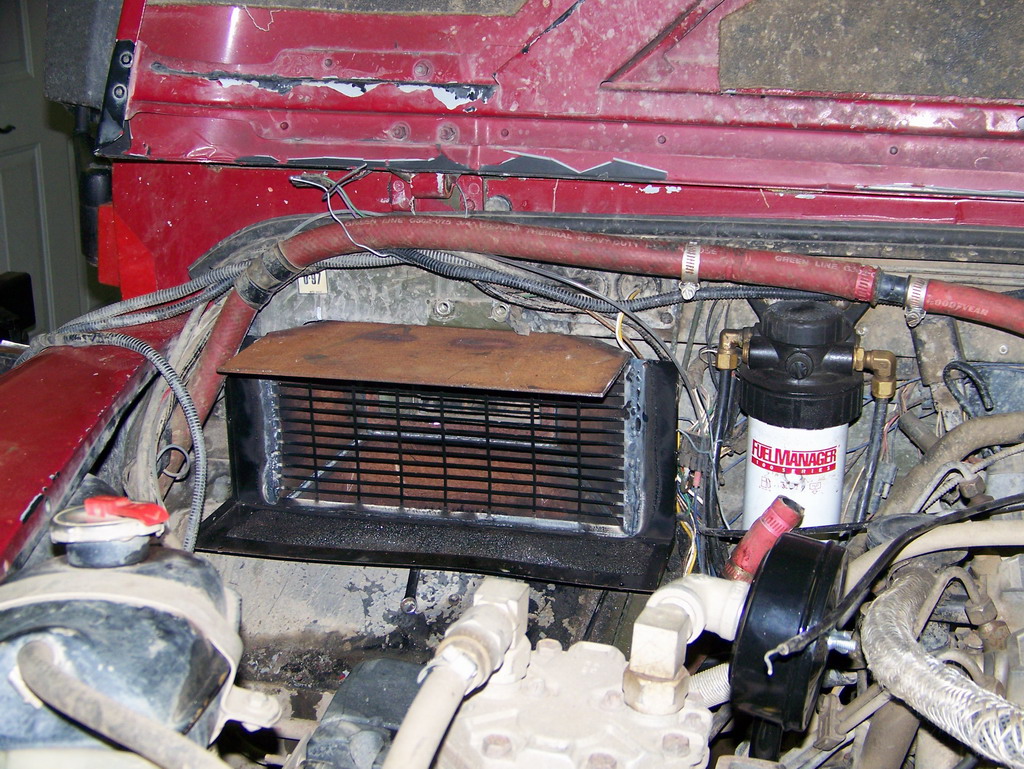
And here is the complete install for the first stage of the project. You notice that in the coolant supply line to the heater is a valve. This is needed to control the heat output of the heater. In order to work in the correct direction with the stock lever, it needs to be a push to open, pull to close valve. I used a MEI corporation model 2252 valve.
The table below shows the measurements for the heater as installed.
- I'm getting twice the heat output over stock with a much higher air temperature.
- Air temperature is much higher. This means I'm getting
warm air even before the temperature gauge has moved which is a huge
benefit in in town driving.
| MCCI | Stock | Units | ||||
| Low | Medium | High | Low | High | ||
| Inlet Temperature | 8 | 8 | 8 | 7.5 | 7.5 | C |
| Outlet Temperature | 70 | 68 | 67 | 50 | 49 | C |
| Flow Rate (inlet) | 62 | 95 | 119 | 37 | 71 | l/s |
| Flow Rate (outlet) | 75 | 115 | 143 | 42 | 81 | l/s |
| Heat Produced | 4208 | 6327 | 7673 | 1731 | 3260 | W |
| MCCI | Stock | Units | ||||
| Low | Medium | High | Low | High | ||
| Inlet Temperature | 46 | 46 | 46 | 46 | 46 | F |
| Outlet Temperature | 157 | 155 | 152 | 122 | 120 | F |
| Flow Rate (inlet) | 131 | 201 | 251 | 78 | 149 | cfm |
| Flow Rate (outlet) | 159 | 244 | 303 | 89 | 172 | cfm |
| Heat Produced | 14359 | 21590 | 26182 | 5906 | 11122 | btu-h |